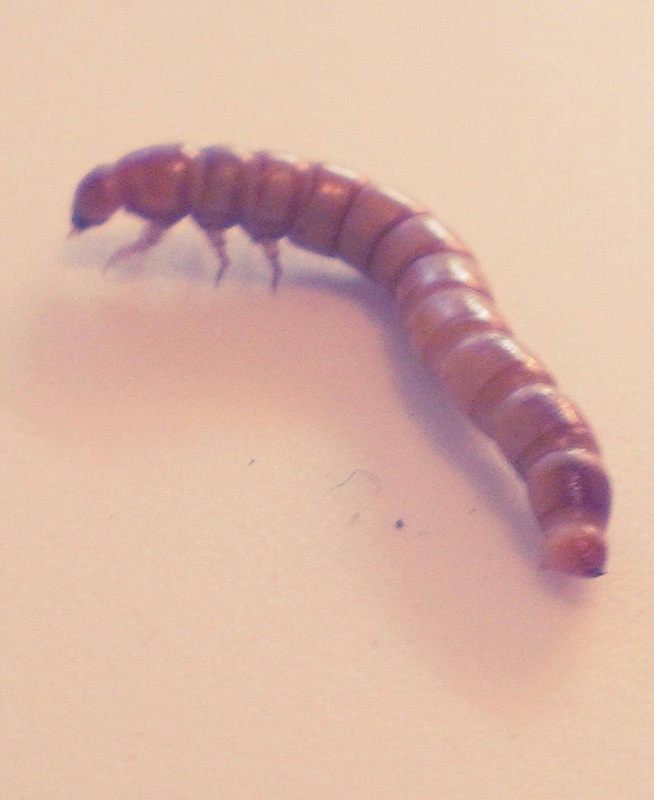
How It Works - Breeding Mealworms The mealworms you start with will eat the substrate that you will provide as described below. As they eat and grow, they will shed their exoskeleton and increase in size. The shed exoskeleton will be visible and often sits on the top of the substrate. When the larval stage is complete, the larvae will become dormant and will often be found semi-curled in the corner of the container, on the surface. During this dormancy, they will stop eating and begin the metamorphism into the pupae. This is when they are transforming into the darkling beetle. Once the pupae has matured, and the beetle has emerged, you will be presented with the only stage of this critters life that can reproduce. These beetles can often be seen breeding in plain sight. Once copulation has transpired, the female will lay eggs in the substrate or on "cage furniture" that you may have provided. The female will lay hundreds of eggs at a time, but they are extremely difficult to see as they normally become consumed within the substrate. |
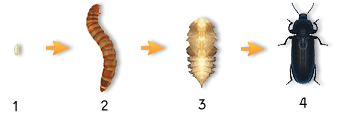
1. Egg
2. Larvae 3. Pupa 4. Beetle |
Materials Required - Breeding Mealworms
Breeding Containers
Breeding Containers Screen Mesh
Substrate
Heating Device
Mealworms
Breeding Container Preparation - Breeding Mealworms
Watering - Breeding Mealworms
Heating - Breeding Mealworms
Feeding - Breeding Mealworms
Gut Loading - Breeding Mealworms
General Maintenance - Breeding Mealworms
Final Notes - Breeding Mealworms
Site : http://www.herpcenter.com/breeding-feeder-insects/breeding-mealworms.html
Breeding Containers
- Just about any smooth sided container will work. I currently have a colony going using 4 ten gallon aquariums. In the past I have used sterilite and rubbermaid containers with great success.
- So long as the container can provide a decent amount of ventilation (to prevent molding), has smooth sides so the mealworms and beetles can't climb out, and you have a modified cover (ventilation), it can potentially work.
- You want to have at least 2-3 containers prepared. This will allow you to keep the mealworms, pupa, and beetles separate. Doing this will help you yield the most mealworms from your colony.
- I am currently using a 4 container system and intend on adding a 5th container. If you have a large collection of reptiles to feed, you too may want to consider additional containers.
Breeding Containers Screen Mesh
- Most containers are going to require some screen mesh to allow for proper ventilation while still containing the mealworms and beetles. I myself have altered the covers of my aquariums to use a customized screen cover I have built. If you would like instructions for this, have a look here: Custom Screen Tops
Substrate
- I use a mixture consisting of powdered milk, multi grain (dry) baby food , oatmeal, and cornmeal. I don't just toss them in. Instead, I prefer to blend it all into a fine powder with a blender. This is not a required step, but retrieving the mealworms is much easier when I do this.
- The items I use for my substrate are not what you need to use. Instead, any variety of bran flakes, cornmeal, cheerios, etc. can be used. You want to make sure that the mealworms have a substrate that contains grains as this is a normal diet for them, and it also provides a valuable amount of nutrition.
- If you live near a feed store, any whole grain mixture they sell would be excellent, and preferred over the diet I currently use.
Heating Device
- This is actually an optional piece of the puzzle. If you are seeking maximum output from your colony, and do not have a room in your home that is a fairly consistent 75-77 degrees, you will want to use a heating device.
- I use an undertank heater to maintain my colonies. I measure the temperature of the substrate, opposed to the air, and have found that temperatures between 75 and 77 degrees do extremely well.
Mealworms
- Mealworms are required to get the colony going. To begin a successful colony, I suggest starting with no less than 150 mealworms. This will provide you with a large number of beetles to be bred. I prefer to start new colonies with 500 mealworms.
Breeding Container Preparation - Breeding Mealworms
- The first thing I do is clean the container thoroughly. I do this to ensure that my colony is going to start out in the most sanitized of conditions. I then proceed to mix the substrate and spread it on the bottom of the container. I like to have a layer that is at least 3 inches thick.
Watering - Breeding Mealworms
- I offer my mealworms moisture by way of carrots and potatoes. I prefer carrots over the potatoes as they don't mold. Instead, they get rubbery until they dry out. Potatoes slices do work extremely well as a means to transfer moisture.
Heating - Breeding Mealworms
- My mealworms are kept at a consistent 75-77 degrees, though they can be maintained at room temperature, which I have done in the past. Heating the mealworm colony will yield more mealworms, at a faster rate than those kept at the average 70 degrees.
Feeding - Breeding Mealworms
- The substrate you have chosen is also the diet you are feeding to your mealworms. For this very reason, you should aim to use the highest quality bedding that you can. What you put into your mealworms for nutrition is what you will ultimately be putting into your reptiles as well.
Gut Loading - Breeding Mealworms
- Gut loading is the process by which your insects are fed nutritious foods before being offered to your reptile. Gut loading is usually done with high nutrient foods for a period of 24-48 hours prior to being offered to your pet. This ensures that your reptile is being given the most nutritious mealworms you can offer.
General Maintenance - Breeding Mealworms
- You want to check your containers daily. If your mealworms have no moisture source, add one. If you see dead mealworms or beetles, remove them. Transfer any beetles you come across to the breeding container. Ensure that you have an adequate amount of food in with the mealworms. If you find that the food level is scarce, you should use that opportunity to empty the container completely, disinfect it, re-add fresh substrate, and then re-add the mealworms.
- If you are vigilant and maintain your colony, it will continuously produce mealworms for you.
Final Notes - Breeding Mealworms
- The entire process of a mealworm going from egg to beetle takes between 10-12 weeks. Those that do not use supplemental heating may experience longer time frames however.
- When you start your colony, expect it to take 4-6 weeks before any visible babies are present. Just be consistent and before you know it, the petstore will become a thing of the past. Use the money you have saved to get another reptile!
Site : http://www.herpcenter.com/breeding-feeder-insects/breeding-mealworms.html
